Friday, April 15, 2011

Inspiration Nation!

Friday, April 15, 2011 0
HAPPY FRIDAY!

Although I am currently working on my new FAVORITE project I have ever done, I have nothing to post of my own. So I figured I would show a few of the images I have included in my HUGE collection of inspirational rooms. I also decided to give each one of them a rating just for fun!

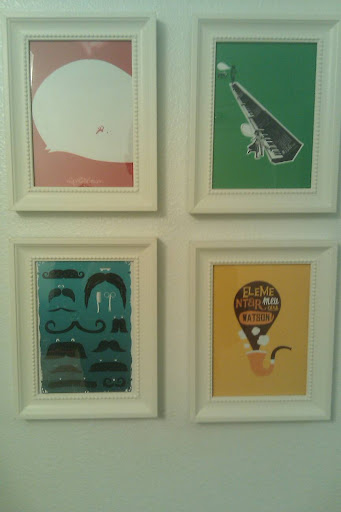
I love the panelling in this room, it gives it a really classy feeling to build up on. The contemporary bubbles hanging from the ceiling add a bit more of color and a splash of modern taste. I give this room an B-!
As you may notice, I LOVE oversized incandescent lightbulbs. They give a slight industrial sensibility to the space and with this clear bulb, it provides ample light to the accent chair. B+

First of all, I LOVE love lOvE floating shelves (I have some in my bedroom) and it is even better that this designer added a painted elk head to the wall, inside an empty frame! B
This space has a very light and clean feeling. I love the IKEA frame that was painted from black to ivory, I actually own that frame and think that this is a viable option for my own decor. They have tied in the ivory frame with a lamp shade and rotary telephone of the same color. B
This room is exactly my style! Yellow is my favorite color and I love using that along with black accents. The wall color is perfect, not too overbearing, with the yellow pillows and black vases on the side tables and coffee table. B++
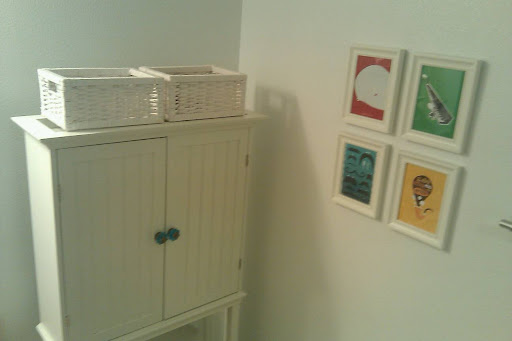
Another great example of something I would definitely have in my room. This sideboard has been updated with a backsplash of color. This is a great way to take an old piece of furniture and give a new and colorful purpose. Great for an office or bedroom! I give this an A-
JACKPOT! This room is a treasure trove of color. The designer has utilized a the gray walls and complimented them with jewel tones all around the room. Yellow doors in the back, a dark purple lamp shade, various pillows on the couch and vases on the mantle. The real gem is the rug on the floor, it really ties the whole space together. A!


Saturday, April 9, 2011

Design Makes the Heart Grow Fonder

Saturday, April 9, 2011 2
So, here are some pics to illustrate for you the updates I have made to my room since I no longer share it with someone. I have moved in a Victorian couch that I picked up for FREE. Thrown splashes of yellow everywhere, hung a curtain along a wall to give the walls a nice treated look.


These curtains are on opposing sides of the room, but they match, which I think brings a nice feel to the room.


Monday, March 28, 2011

Oops

Monday, March 28, 2011 0
So I know I said I would post something YESTERDAY, but leave it to me to have everything work against me. Blogger wouldn't let me upload a single thing. My camera stopped working altogether. So I am now updating with no multi-media aspects. As I said, I had a bum shelf in my room and it finally kicked the bucket! I promise as soon as I fix everything I will update the world wide web with the most amazing decor post ever!

Ethan

Saturday, March 26, 2011

Saturday, March 26, 2011 0
I have recently been taking a break from blogging, I have been quite busy, with school and rehearsals. I am back now, and I am planning on making a nice big post tomorrow! :D Thought I would just pop on and see what is up today. I have had to make a few changes to my room yesterday and today, because a floating shelf I bought at Target broke and left some marks on the walls. I had to perform some major decor magic but now I think I like the look of the room even more. I will show pics of that tomorrow!

Till next time,
Ethan.

Saturday, March 12, 2011

Wine + Creativity = Magnets?

Saturday, March 12, 2011 1

My roommates and I (those over 21, of course) ;) enjoy the occasional bottle of wine! I noticed that a lot of the bottles have really nice fun designs on the front label, so I decided to try and matte it on colored/patterned cardboard and turn them into magnet, I have four so far! Tell me what you think!

Tuesday, February 8, 2011

Tutorial: Butterfly Shadow Box

Tuesday, February 8, 2011 3

One of my more recent DIY projects involved some butterfly magnets I got from Paper Source in downtown Portland, OR on a trip I took to home.

Things you may need:
- Scissors
- Cork board
- Thin/Long piece of metal
- Shadow Box
- Butterflies (or anything else you want to put inside.)
- Stapler

Here we go step by step:

1. Cut out piece of cork board to fit the frame you are using. (You could easily use anything you want for the back board of the frame, but cork was easy to mount on and gave a nice textured look for the background of the colorful butterflies.)


2. Choose picture frame.


3. Staple metal piece to the cork board. (You try using a straightened paper clip if it is thin enough.)


4. Arrange butterflies on the metal piece. (Try putting the butterflies facing the same direction, then try facing them in opposition, see which you like the most.)


5. Place the mounted butterflies into the frame and make sure that everything is secure.


6. Find a creative spot to place you small, yet explosive patch of color and fun!


There ya go! Let me know what you think of mine, and send me a pic if you make one!

Mirror, Mirror on the Wall, Who's the Bloggiest of Them All?

Today, I added a large silver mirror from IKEA to my room above my desk. This large round mirror adds pseudo space to the area. Unfortunately, I share my room, so this adds to the limited space between the two of us.


I also added three shelving units from Target, they are various sizes, so that gives it a fresh look. I used one shelf to house my recent Christmas and Holiday cards, another to put books, a vase and candle on, and the third for two shadow box picture frames. One contains a picture I bought from IKEA, and the smaller one I made, (I lined the back with cork, and mounted fake butterflies to it).


Here is a view of all the additions I just made to my room, hope you like them! The bedding in the pic is also a mix and match from IKEA. The 'E' above the bed is something I made with a little helo from Microsoft Word and my friends at FedEx Kinko's!


See ya 'round!

Friday, January 14, 2011

London and Soffits and Stickers, Oh My!

Friday, January 14, 2011 1
I have seen a lot of decal stickers used as decorations in living rooms, bedrooms, bathrooms, etc., I thought most of them were gaudy or just plain tacky, but I found these great London skyline decals that gift perfectly on a space that I was dying to utilize. In my kitchen/entryway there are a few soffits, I decided to place the stickers above a doorway, a closet and the soffit. I think it is a nice little detail that adds mild flair to the space.
Published with Blogger-droid v1.6.5

Thursday, January 6, 2011

Bringing Color to My Favorite Room!

Thursday, January 6, 2011 3

Posting this one from my phone! I added some color to my bathroom! I found these prints online and printed them on photo paper off my own printer. I put them in $5 IKEA frames and used screws to hang them.

I also switched out the standard door handles on my over-the-toilet space saver for clear blue handles $8 each from Anthropologie!
Published with Blogger-droid v1.6.5

Sunday, January 2, 2011

Ma and Pa make a Spa!

Sunday, January 2, 2011 2
My parents are redoing the bathroom off of their bedroom, now usually I would call this a master bathroom; however, their bathroom is incredibly tiny, no more than 8x10 ft. So we/they were working with quite a small area to play with. They completely gutted this entire space, put in new flooring, paint, built-in cabinets, hardware and decor. This is update #1 from the Homeland. ATTENTION: From now on I will refer to my parent's house as the HOMELAND!!!

New Sink
The sink is a bowl, with a stainless steel faucet. The streamline finish on the top goes well with the classically ornate detail on the sink base.
Sink Base
The sink base has ageless and elegant design with a granite top. The contrast with the modern sink/faucet adds some flare to the bathroom.

My Mother is most excited for her new built in cabinet. This is actually where the old toilet lived, now this will become a hiding spot for the laundry basket along with linens, complete with closing doors.
Here is a terrible shot I took on my phone of the new lighting fixtures on the ceiling and over the vanity. Stainless steel matches the faucet directly below.

I will make sure to keep you all updated on the headway made on their bathroom as they go. I cannot wait to see how they finish it off. They asked me to help with the decoration. As soon as I go back to LA, I will start to prepare their decor. I am thinking about adding a few "His and Hers" touches to the bathroom. Although it is not a double sinked bathroom, I think that finding subtle ways to hang little "His and Hers" plaques above the sink and around the cabinet would add to the ma and pa cottage feel.
 
◄Design by Pocket